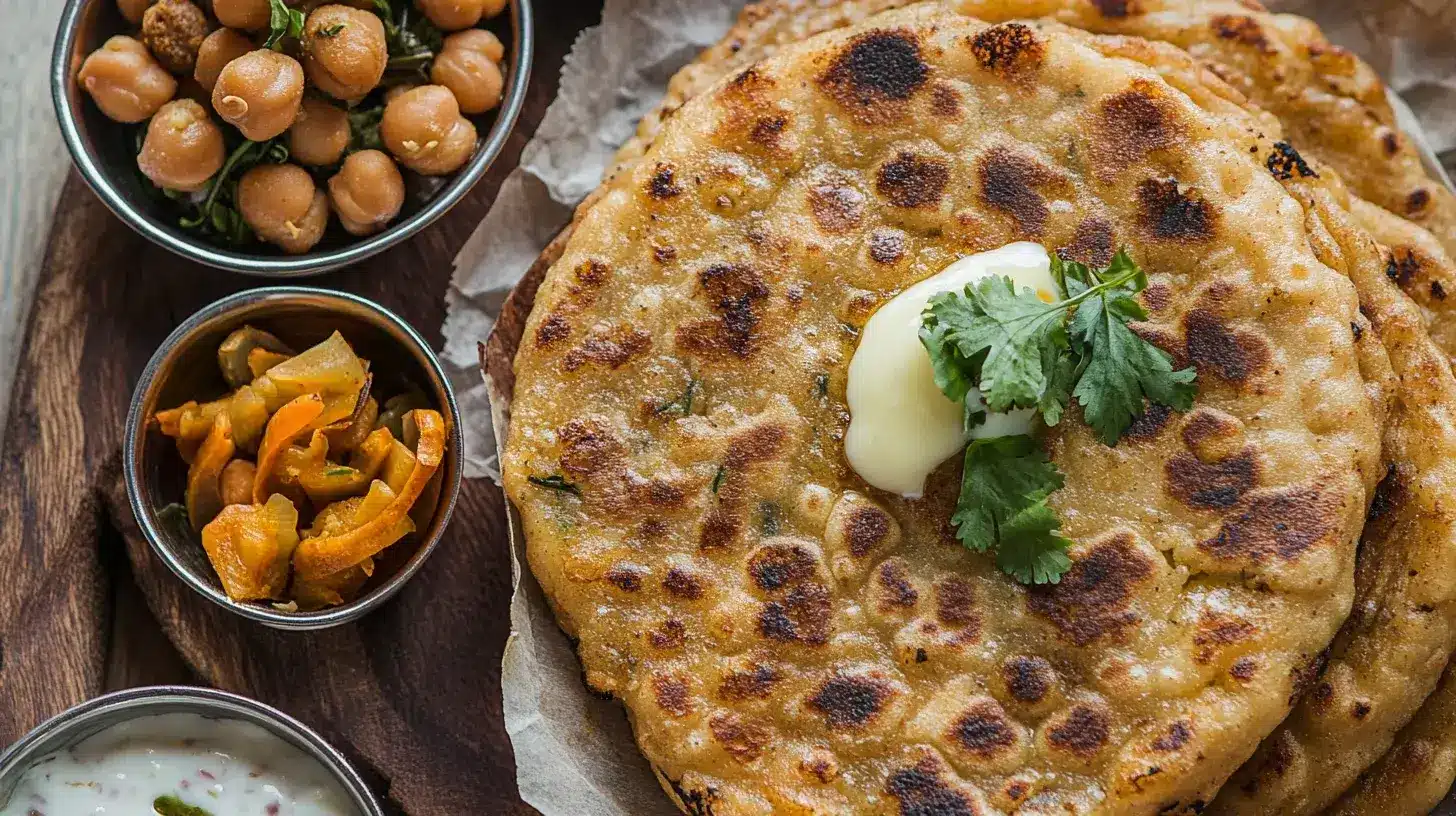
There is no introduction necessary for the traditional North Indian flatbread onion kulcha. Its delicate texture and wonderfully flavored onion filling make this dish the kind of one that transforms an everyday dinner into something unforgettable. Kulchas traditionally have crispy edges and a smoky taste since they are cooked in a blazing-hot tandoor. Not many of us, though, have a tandoor sitting in our kitchens! This stovetop dish comes to save the day in such regard.
This recipe is perfect for home cooks who want to enjoy authentic Indian flavors without investing in special equipment. To be honest, with only a tawa or skillet, who knew you could get that ideal combination of soft, fluffy bread and acidic onion filling?
I opted to make these onion kulchas during a recent lunch with my family, and let me say—watching the golden-brown kulchas puff up on the tawa was strangely delightful. Perfect comfort cuisine nirvana when combined with some creamy chole and a splash of butter!
What is Onion Kulcha?
Indian flatbread with a soft, somewhat chewy texture and delicious onion stuffing is onion kulcha. Originally from North Indian cuisine, this is a popular meal eaten at home and in dhabas, roadside restaurants. Kulchas are a sort of yeast-free bread since they rely on baking soda and baking powder rather than yeast as a leavening agent like naan does.
The spiced onion filling—usually composed of finely chopped onions, spices like cumin and garam masala, and a tangy flavor of anardana—dried pomegranate seeds—sets onion kulcha apart. Every mouthful of this filling explodes with taste either piled inside the bread or laid on top.
Enjoy it on its own with a smear of butter, onion kulcha is a crowd-pleaser whether you mix it with curry accompaniments like dal makhani. Making it at home also allows you to avoid the tandoor and yet replicate that restaurant-style excellence.
Ingredients for Making Homemade Onion Kulcha
Making onion kulcha requires simple ingredients that you probably already have in your pantry. Here’s what you’ll need:
Dough Ingredients:
- All-purpose flour (maida) – 2 cups (can substitute with whole wheat flour for a healthier twist).
- Baking powder – 1 tsp (helps the bread rise slightly).
- Baking soda – ½ tsp (creates the soft texture kulchas are known for).
- Salt – 1 tsp.
- Yogurt – ½ cup (makes the dough tangy and soft).
- Water – as needed to knead the dough.
- Oil or ghee – 1 tbsp, for kneading.
Filling Ingredients:
- Onions – 2 medium-sized, finely chopped.
- Anardana (dried pomegranate seeds) – 1 tsp (for tanginess).
- Green chilies – 1-2, finely chopped (optional for spice).
- Spices:
- Cumin seeds – ½ tsp.
- Red chili powder – ½ tsp.
- Garam masala – ½ tsp.
- Chaat masala – ½ tsp.
- Fresh coriander leaves – 2 tbsp, chopped.
- Salt – to taste.
Optional Toppings:
- Nigella seeds (kalonji) – for a traditional touch.
- Butter or ghee – for brushing after cooking.
Step-by-Step Guide to Stovetop Onion Kulcha Recipe
Making onion kulcha from scratch might seem a little intimidating, but trust me—it’s actually pretty simple once you break it down into manageable steps. Let’s dive right in!
1. Preparing the Dough
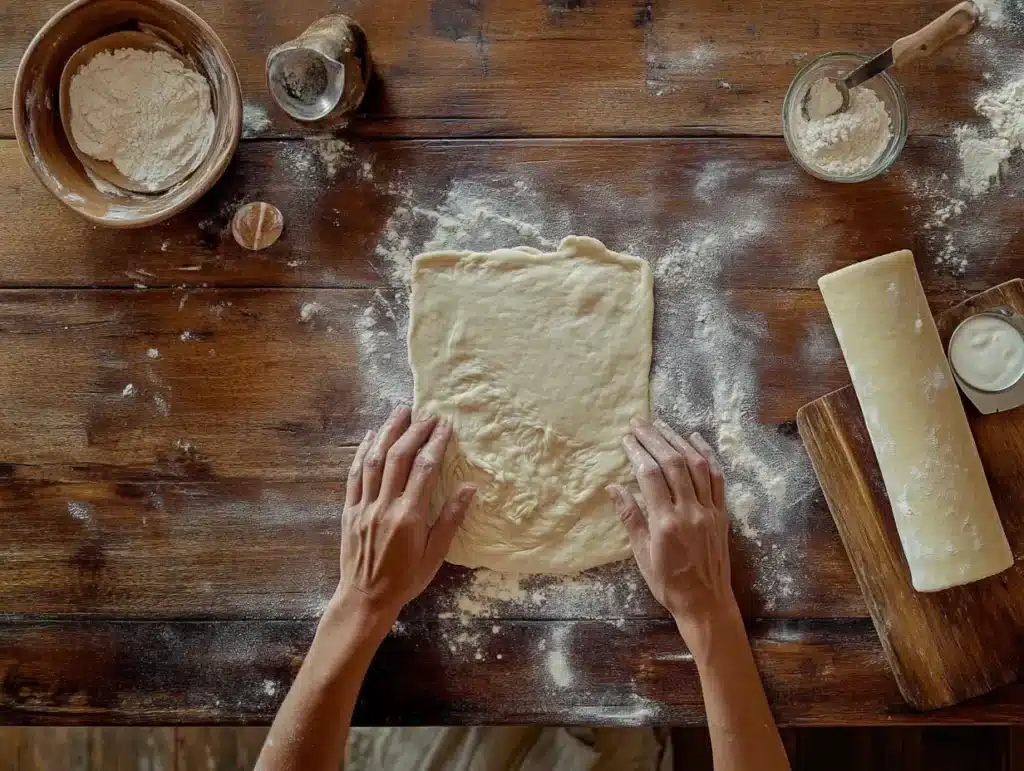
The dough is the base of your kulcha, and getting it right is key to achieving that soft, fluffy texture. Here’s how to do it:
- Grab a large mixing bowl and start with your dry ingredients: 2 cups of all-purpose flour (maida), 1 tsp of baking powder, ½ tsp of baking soda, and 1 tsp of salt. Stir these together using a whisk or just your hands—honestly, whatever works for you! This step makes sure the leavening agents are evenly distributed, which is super important for a good rise.
- Now, it’s time for the magic ingredient: yogurt. Add ½ cup of plain yogurt to the dry mix. Yogurt not only softens the dough but also adds a slight tang that makes kulcha so irresistible.
- Start kneading the dough by adding water little by little. Be patient—don’t pour all the water at once, or you’ll end up with a sticky mess. The goal is a soft, smooth dough that’s just firm enough to hold its shape.
- Once the dough starts coming together, drizzle 1 tablespoon of oil or melted ghee over it. This helps keep the dough pliable and adds a touch of richness. Knead for another 5–7 minutes until the dough feels smooth and elastic.
- Cover the bowl with a damp cloth or plastic wrap and let the dough rest for at least 1 hour. If you have more time, 2 hours is even better! Resting allows the baking soda and yogurt to activate, making the dough airy and easy to work with.
Pro Tip: If you’re using whole wheat flour instead of maida, you might need a little extra water to get the same soft consistency.
2. Making the Onion Filling
The onion filling is what makes this kulcha truly shine. It’s tangy, spicy, and full of bold flavors that’ll have you coming back for seconds (or thirds!). Here’s how to make it:
- Start by finely chopping 2 medium-sized onions. The key here is “finely”—large chunks can make rolling out the kulcha tricky later. If you’re in a hurry, you could even use a food processor to get the job done quickly.
- In a bowl, combine the chopped onions with 1 tsp of anardana (dried pomegranate seeds), ½ tsp of cumin seeds, ½ tsp of red chili powder, ½ tsp of garam masala, and ½ tsp of chaat masala. Add salt to taste.
- Want to add a little kick? Toss in 1–2 finely chopped green chilies. Not a fan of heat? Feel free to skip this step—it’s your kulcha, after all!
- Add a handful of freshly chopped coriander leaves (about 2 tablespoons). This adds a nice pop of color and freshness to the filling.
- Mix everything together until well combined. Let the mixture sit for 5–10 minutes. This resting time helps the flavors meld together beautifully.
- Before stuffing, give the onion mixture a gentle squeeze to remove excess moisture. Trust me, this step is crucial. Too much moisture can make the filling soggy and difficult to handle when rolling out the kulcha.
Pro Tip: If you don’t have anardana, you can use a splash of lemon juice for a similar tangy flavor.
3. Assembling the Kulcha
Here’s where the fun begins! Assembling the kulcha is like putting together a delicious little package.
- Once the dough has rested, divide it into small portions. Each portion should be about the size of a golf ball or a small lime.
- Take one dough ball and roll it out into a small circle, roughly 4–5 inches in diameter. If the dough sticks to your rolling pin, dust it lightly with flour.
- Place a spoonful of the onion filling in the center of the circle. Don’t skimp on the filling—it’s what makes the kulcha so flavorful! But be careful not to overdo it; too much filling can cause the dough to tear.
- Gather the edges of the circle and pinch them together at the top to seal the filling inside. It should look like a little dumpling at this point.
- Flatten the stuffed dough ball gently with your hands. Then, using a rolling pin, roll it out again into a larger circle (about 7–8 inches in diameter). Be gentle here—you don’t want the filling to spill out.
Pro Tip: Use light, even pressure while rolling. If a little filling escapes, don’t stress—just sprinkle it back on top before cooking.
4. Cooking on Stovetop
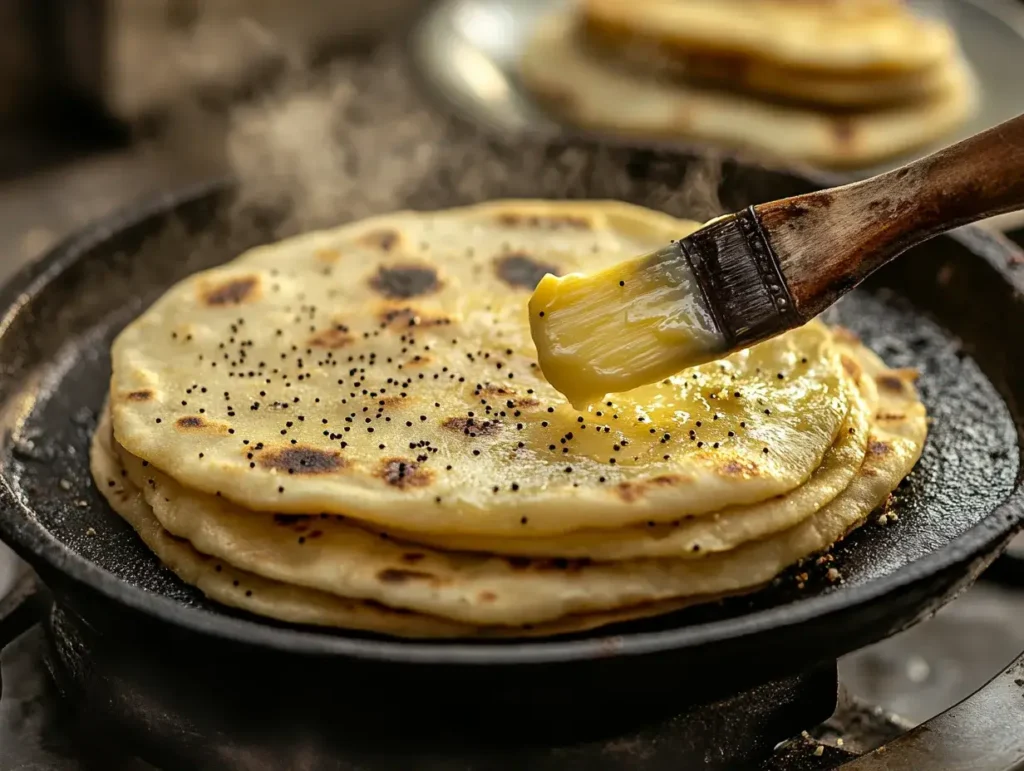
Cooking the kulcha on a tawa (flat skillet) is quick and easy, and it gives you that signature golden crust. Here’s how to do it:
- Heat a tawa or skillet over medium heat. Make sure it’s properly heated before you start cooking; a lukewarm pan won’t give you those nice golden spots.
- Place the rolled-out kulcha on the hot tawa. Cook for 1–2 minutes, or until you see bubbles forming on the surface.
- Flip the kulcha and cook the other side for another 1–2 minutes. Press down gently with a spatula to ensure even cooking.
- Brush the cooked side with melted butter or ghee for added flavor. If you want to go the traditional route, sprinkle some nigella seeds (kalonji) on top.
- Flip the kulcha one last time and cook for 30 seconds to 1 minute, or until both sides are beautifully golden and slightly crispy.
Repeat the process with the remaining dough balls and filling.
Pro Tip: To mimic the smoky flavor of a tandoor, you can char the cooked kulcha directly over an open flame for a few seconds.
5. Additional Cooking Tips:
- If you prefer a crispier kulcha, cook it on medium-high heat and flip it a couple of extra times.
- For a softer texture, keep the heat on low and cover the kulcha with a lid while it cooks.
- Don’t skip the butter or ghee—it not only enhances the flavor but also keeps the kulcha moist and tender.
By following these steps, you’ll end up with homemade onion kulchas that are soft, flavorful, and oh-so-delicious. Each bite is a perfect mix of tangy onion filling and buttery, pillowy bread. Honestly, once you’ve tried this recipe, you’ll never look at store-bought kulchas the same way again!
Serving Suggestions for Your Homemade Onion Kulcha
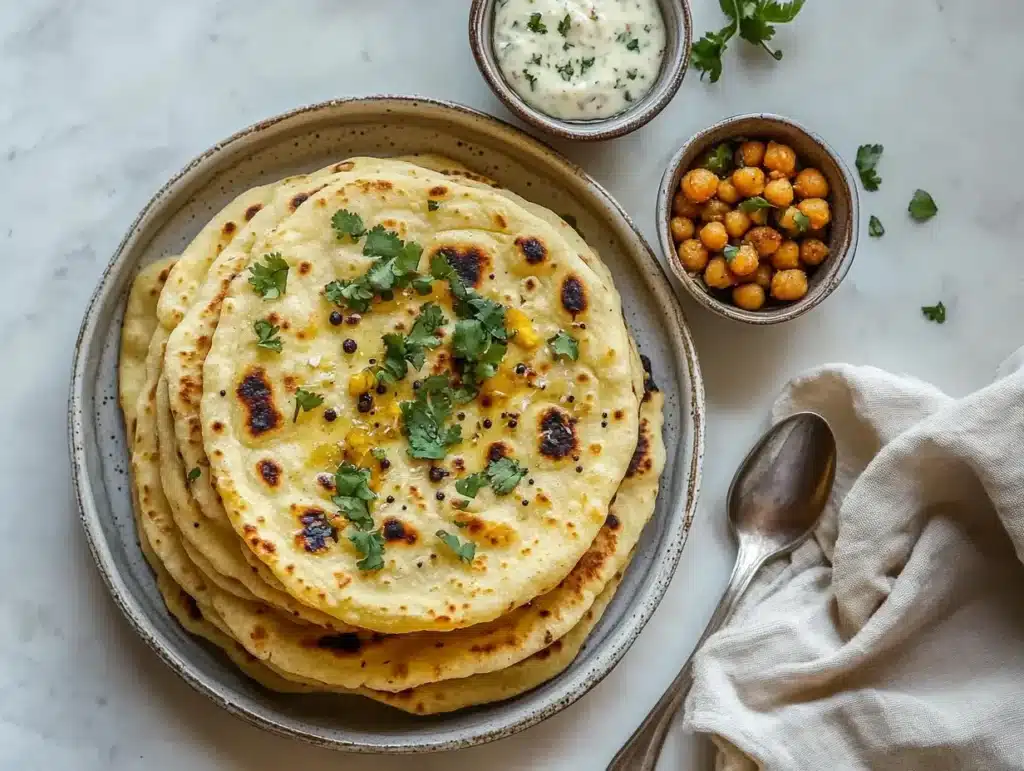
When you’ve made onion kulcha, the next thing you’ll probably wonder is, “What should I serve it with?” It’s such a versatile bread that you really can’t go wrong. Let me walk you through some of the best options—it’s like choosing the perfect sidekick for a star performer!
- The Classic Combo: The all-time favorite pairing is with chole, which is spiced chickpea curry. Trust me, there’s something magical about scooping up thick, flavorful curry with soft, buttery bread. Add a dollop of yogurt or raita, and you’ve got a meal that’s as comforting as it is delicious. If you want to explore other types of Indian bread to pair with chole, learn more about Indian bread variations and techniques here.
- Simple and Quick: In a rush? No worries! Just brush your freshly made kulcha with some butter or garlic butter, and eat it as is. Seriously, the soft, golden bread with crispy edges doesn’t even need anything extra to shine.
- A Fusion Twist: Okay, this one might sound a little unusual, but have you ever tried pairing onion kulcha with French onion soup? The buttery bread and the cheesy, savory soup create a combo that’s surprisingly addictive.
- For Spice Lovers: If you’re someone who loves a little heat, serve your kulcha with tangy pickles or a spicy green chutney. The bold flavors of the condiments perfectly balance the richness of the bread.
Pro Tip: Always serve your kulchas warm, straight off the tawa. A quick brush of butter right before serving adds a glossy finish and makes the bread even softer. Trust me, it’s worth the effort!
Cooking Tips for Perfect Kulcha
Making onion kulcha at home might seem tricky at first, but once you know the little tricks, it becomes a breeze. Let me share a few tips I’ve picked up (after a few less-than-perfect batches, if I’m being honest).
- Knead the Dough Thoroughly: This might feel like a workout, but it’s so important! Kneading the dough properly—about 7–10 minutes—makes it smooth and elastic. If the dough feels too sticky, just sprinkle in a little flour.
- Rest the Dough: Don’t skip this step! Letting the dough rest for at least an hour helps it become soft and easy to roll. It’s like giving the dough some “me time” before you put it to work.
- Don’t Overfill the Kulcha: While it’s tempting to stuff in as much filling as possible, trust me, less is more. Too much filling can tear the dough or spill out while rolling. A modest amount works best.
- Seal It Tight: Make sure you pinch the edges of the dough well after adding the filling. Think of it like sealing an envelope—if it’s not closed properly, things will get messy!
- Control the Heat: A tawa that’s too hot will burn your kulcha before it’s cooked inside, and one that’s too cool won’t give you those lovely golden spots. Medium heat is the sweet spot, so keep an eye on it.
Bonus Tip: Want that smoky flavor you get from a tandoor? Try holding the kulcha over an open flame for a few seconds. It’s a small step, but it makes a big difference!
Variations of Onion Kulcha You Can Try at Home
While onion kulcha is a classic, there’s no harm in experimenting. In fact, trying new variations is half the fun. Here are some ideas you can play around with:
- Whole Wheat Kulcha: For a healthier twist, replace the all-purpose flour with whole wheat flour. It’s a bit denser but just as tasty.
- Paneer Kulcha: Swap the onion filling for crumbled paneer mixed with spices. It’s creamy, flavorful, and always a hit at my house.
- Garlic Butter Kulcha: Love garlic? Mince some fresh garlic and mix it into melted butter, then brush it over the kulcha as soon as it’s off the tawa. The aroma alone is worth it!
- Cheese-Stuffed Kulcha: This one’s for the cheese lovers. Add grated cheese, chili flakes, and a pinch of oregano to the filling for a gooey, indulgent treat.
- Mixed Veggie Kulcha: Use finely chopped carrots, peas, and bell peppers seasoned with your favorite spices for a colorful and nutritious option.
Feel free to get creative—kulcha is super forgiving, and it’s fun to make it your own.
Nutrition Facts
Here’s a quick breakdown of what’s in a single serving of onion kulcha (because let’s face it, we all like to know what we’re eating):
| Nutrient | Amount |
|---|---|
| Calories | ~180 kcal |
| Carbohydrates | 25g |
| Protein | 5g |
| Fat | 6g |
| Fiber | 2g |
If you’re looking to cut calories, you can use less butter or switch to whole wheat flour. But honestly, the butter is part of the magic—don’t skip it entirely!
Storing and Reheating Your Stovetop Onion Kulcha
If you’ve got leftover kulchas (which rarely happens in my house), here’s how you can store and reheat them to keep them tasting fresh:
- Short-Term Storage: Keep them in an airtight container at room temperature for up to two days.
- Freezing: Wrap each kulcha in aluminum foil and pop them into a ziplock bag before freezing. They’ll stay good for months—perfect for when you want to whip up a quick meal.
- Reheating: Warm them up on a tawa or in an oven at 180°C (350°F). If frozen, let them thaw at room temperature first.
Pro Tip: Avoid using the microwave to reheat kulchas. It’s convenient, sure, but it makes the bread chewy and takes away that soft texture.
Related Recipes
If you’re hooked on kulchas, here are a few other recipes you might enjoy:
- “Learn more about Indian bread variations and techniques” to expand your flatbread-making skills. Check it out here.
- “Explore this healthy quinoa salad recipe as a perfect accompaniment to Indian breads” for a wholesome and fresh side dish. You can find the recipe here.
- “Pair your onion kulcha with this flavorful French onion soup for a fusion twist” and try something totally new. Click here to get the recipe.
Reader Interaction and FAQ
I’d love to hear how your onion kulchas turned out! Did you stick to the original recipe, or did you try one of the variations? Leave a comment below—your feedback means the world to me, and I might even learn a new tip or trick from you!
Here are a few common questions about making onion kulcha:
- Can I make onion kulcha without yogurt?
Yes, you can. Try using buttermilk or a mix of milk and lemon juice instead. It works just as well! - How do I stop the filling from leaking out?
Be sure to seal the dough edges tightly. If a little filling spills out, don’t worry—it’ll still taste amazing. - What other fillings can I use?
You can try paneer, mashed potatoes, or even spiced lentils. It’s hard to go wrong with these options. - Why didn’t my kulcha puff up?
It’s likely the tawa wasn’t hot enough. Make sure your pan is well-heated before placing the kulcha on it. - Can I make gluten-free kulcha?
Absolutely! Use a gluten-free flour mix and add a pinch of xanthan gum for binding.
