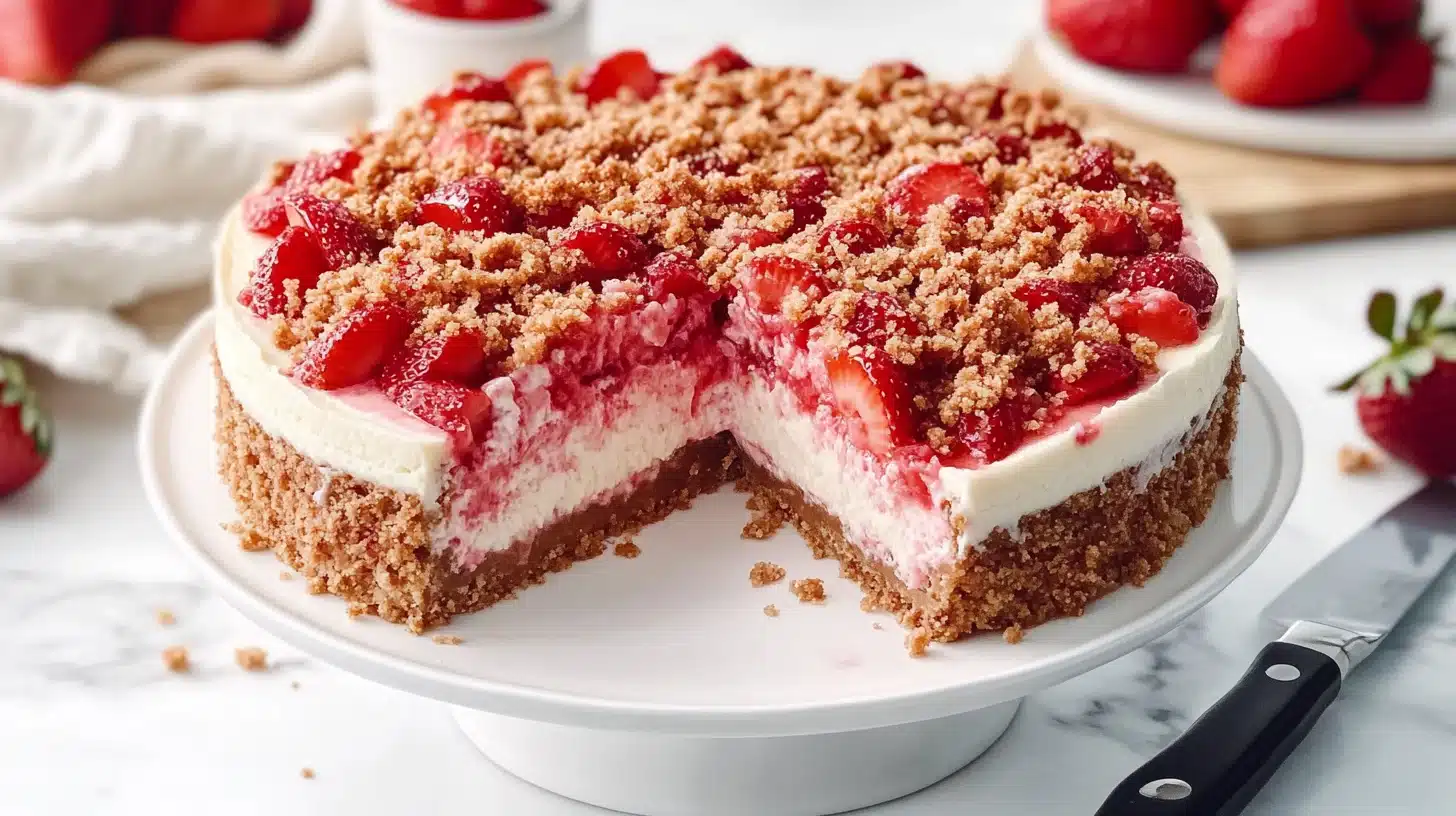
Do you remember those iconic strawberry shortcake ice cream bars from childhood? The ones that were creamy, sweet, and had that addictive, crunchy cookie-like topping? For me, they were the ultimate summer treat. Just thinking about them takes me back to sticky fingers, warm sunny days, and the pure joy of chasing after the ice cream truck. Now, imagine transforming all that nostalgia into a dessert you can make at home—this is exactly what a Strawberry Crunch Cheesecake delivers!
The best part? You don’t even need an oven. Since this is a no-bake recipe, it’s perfect for those days when you don’t want to heat up the kitchen (or, honestly, when you just don’t feel like baking). It’s great for parties, family dinners, or even a little “treat yourself” moment—because let’s be real, we all need those. Plus, it’s a total showstopper. Those layers are so pretty they practically beg to be photographed.
👉 Pro Tip: If strawberries are your thing, you have to check out our Strawberry Earthquake Cake recipe for more creative strawberry desserts. Trust me, you’ll love it.
Why You’ll Love This Recipe
Honestly, there are so many reasons to fall in love with this cheesecake, but let me give you the highlights:
- Super Simple: No water baths, no tricky baking techniques—just mix, layer, and chill.
- Perfect Flavor Combo: The creamy cheesecake filling balances perfectly with the crunchy, sweet strawberry topping. It’s seriously addictive.
- Customizable: Not a fan of strawberries? Swap them out for blueberries or raspberries. Want a chocolate twist? Use chocolate Oreos for the crust. You’ve got options!
- Crowd Pleaser: This dessert is a hit with kids, adults, and everyone in between. Plus, it’s super easy to make ahead, which is always a win.
And let’s not forget the nostalgia factor. If you grew up loving those strawberry shortcake bars, this cheesecake will give you all the feels.
Ingredients for the Best Homemade Strawberry Crunch Cheesecake
Before we dive into the step-by-step, let’s make sure you have everything you need. Here’s what’s going into this masterpiece:
the Crust:
- 2 cups of Golden Oreos, finely crushed (about 20 cookies).
- 5 tablespoons unsalted butter, melted.
For the Cheesecake Filling:
- 16 oz cream cheese, softened (seriously, don’t skip the softening step—it makes everything easier).
- 1 cup powdered sugar.
- 1 teaspoon vanilla extract.
- 2 teaspoons fresh lemon juice (trust me, this adds the perfect tang).
- 1 ½ cups heavy whipping cream, whipped to stiff peaks.
For the Strawberry Crunch Topping:
- 1 cup freeze-dried strawberries, crushed.
- 1 cup Golden Oreos, crushed.
- 2 tablespoons unsalted butter, melted.
Optional Garnishes:
- Fresh strawberries for decoration.
- Whipped cream to make it extra fancy.
- A drizzle of strawberry sauce or even a light dusting of powdered sugar.
Equipment You’ll Need:
- Springform pan (9-inch works best).
- Food processor or rolling pin (for crushing the cookies).
- Electric mixer (you’ll thank yourself for this one).
- Offset spatula or the back of a spoon (for spreading layers).
Step-by-Step Guide to Making Strawberry Crunch Cheesecake
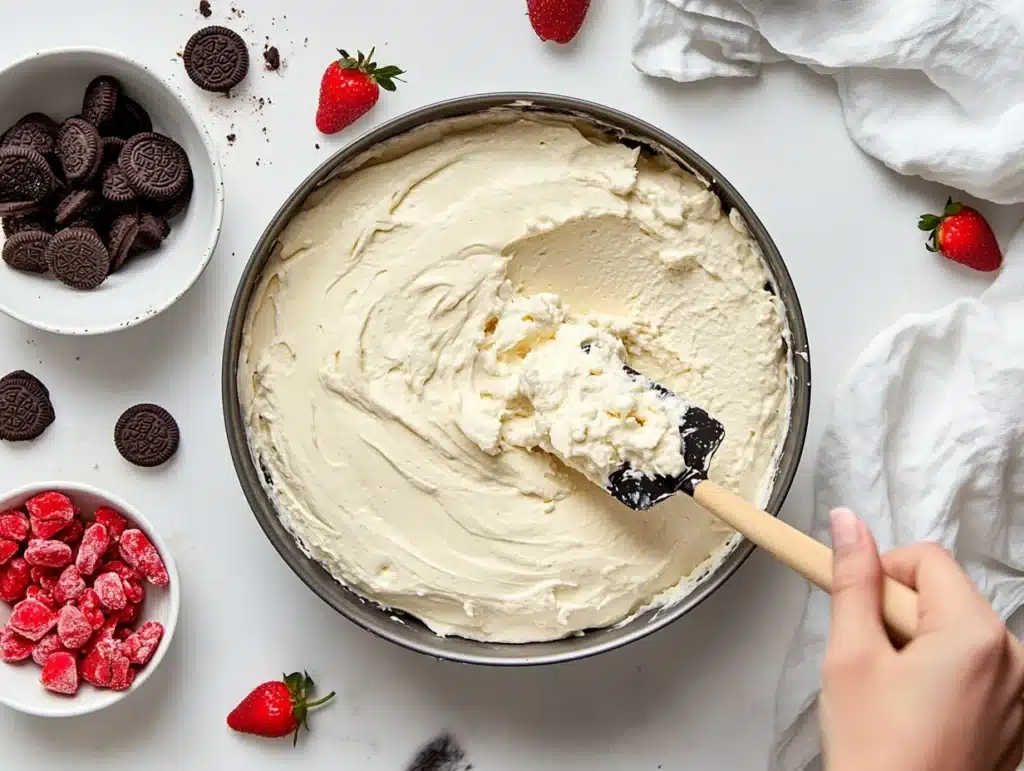
Alright, now for the fun part. Here’s how to put this beauty together. Don’t worry—it’s much easier than it looks.
Making the Crust
The crust is the foundation of any cheesecake, and this one is buttery, crumbly perfection.
- First, crush your Golden Oreos. If you have a food processor, toss them in and pulse until you have fine crumbs. No processor? No problem. Just throw them in a zip-top bag and crush them with a rolling pin.
- Next, mix the cookie crumbs with the melted butter. You’re looking for a texture that feels like wet sand. If it’s too dry, add a little more butter—no big deal.
- Press the mixture into the bottom of your springform pan. I like to use the bottom of a glass or a measuring cup to really pack it down and make it even.
- Pop the crust in the fridge to chill while you work on the filling. This step helps it firm up so it doesn’t crumble when you add the cheesecake.
Preparing the Cheesecake Filling
This is where the magic happens—the filling is creamy, smooth, and absolutely delicious.
- In a large mixing bowl, beat the cream cheese until it’s completely smooth and fluffy. Make sure it’s at room temperature—trust me, it makes a huge difference.
- Gradually add the powdered sugar, vanilla extract, and lemon juice, mixing until everything is well combined. (Pro tip: Taste it as you go. It’s already delicious at this stage.)
- In a separate bowl, whip the heavy cream until stiff peaks form. If you’re not sure, lift the beaters—the cream should hold its shape.
- Gently fold the whipped cream into the cream cheese mixture. Go slow here—you want to keep all that lovely air in the whipped cream so the filling stays light and fluffy.
Assembling the Cheesecake
Now it’s time to put it all together!
- Pour the cheesecake filling over the chilled crust. Use an offset spatula or the back of a spoon to spread it out evenly.
- Smooth the top as much as you can. It doesn’t have to be perfect, but it’ll look prettier when you’re done.
- Cover the pan with plastic wrap or aluminum foil and refrigerate. Let it chill for at least 4-6 hours, but if you can leave it overnight, even better. The longer it chills, the firmer it gets.
Making the Strawberry Crunch Topping
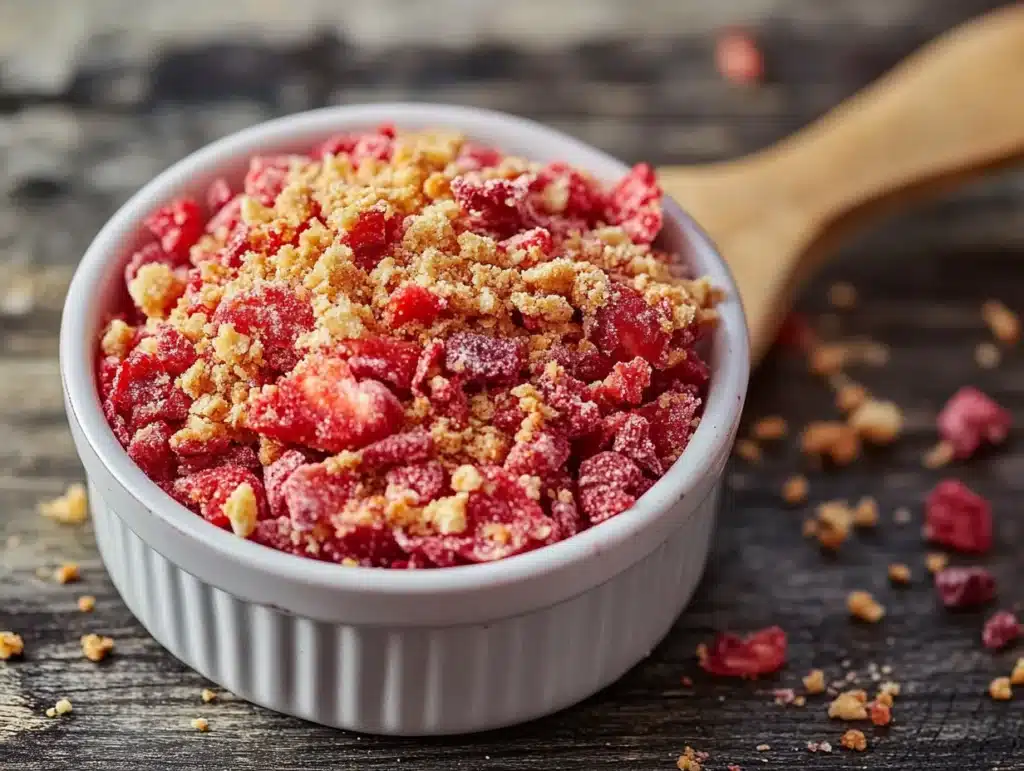
Here’s the part that makes this cheesecake so special.
- Crush the freeze-dried strawberries and Golden Oreos. You can use a food processor or the same zip-top bag and rolling pin method as before.
- Mix the crushed strawberries and cookies with the melted butter. The result should be a crumbly mixture that’s easy to sprinkle.
- Once your cheesecake is fully chilled, sprinkle the topping generously over the surface. Make sure to cover it completely—this is the “wow” factor!
- Gently press the topping down so it sticks to the cheesecake. Be careful not to mess up the creamy layer underneath.
Final Touches
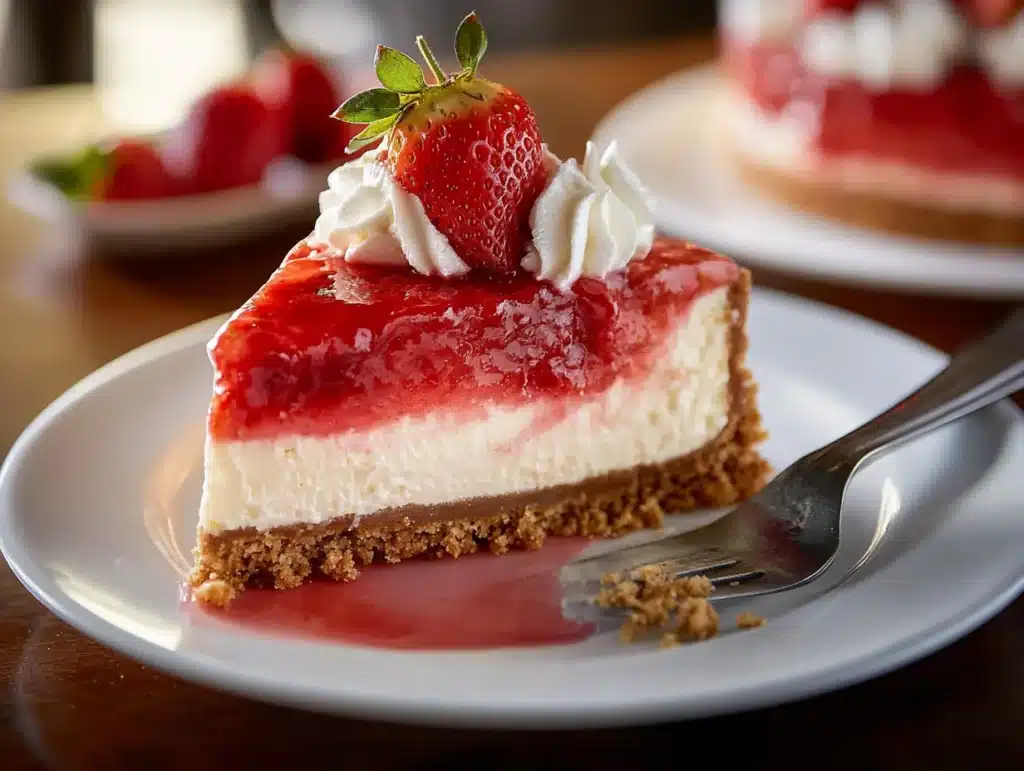
And finally, the finishing touches:
- Add some fresh strawberry slices, dollops of whipped cream, or a drizzle of strawberry sauce to really make it pop.
- For clean slices, use a sharp knife and wipe it clean between cuts.
- Serve chilled and watch everyone’s faces light up when they take their first bite.
👉 Pro Tip: For more fruity cheesecake ideas, check out our Raspberry Cheesecake Ice Cream—a creamy, fruity delight.
Tips for the Best Strawberry Crunch Cheesecake
Pick the Right Ingredients
Let’s be real—no one wants a mediocre cheesecake. You want it creamy, rich, and perfectly crunchy on top. So, here are some tried-and-true tips to help you ace this dessert every single time:
- Full-fat cream cheese is non-negotiable. I get it—low-fat sounds healthier, but trust me, it won’t give you the same smooth and luscious texture. Go all in for the real deal.
- Don’t skip the fresh lemon juice. That little zing brings all the flavors together and stops the cheesecake from feeling too heavy.
- Freeze-dried strawberries are a game-changer for the topping. Not only do they pack an intense strawberry flavor, but they also keep that satisfying crunch.
Texture is Everything
- Make sure your heavy cream is whipped to stiff peaks. This basically means when you lift the whisk, the cream should hold its shape. If it’s too soft, your filling might not set properly.
- Be gentle when folding the whipped cream into the cream cheese mixture. Think of it like you’re tucking in a baby—slow and soft, so you don’t lose all that lovely fluffiness.
Chilling is Key
- I know, waiting is the hardest part, but you have to chill your cheesecake for at least 6 hours. Overnight is even better if you’ve got the patience. It’s worth it, I promise—this step ensures clean slices and that perfect creamy texture.
Fun Swaps to Try
- Feeling adventurous? Swap out strawberries for raspberries or blueberries for a fresh twist.
- Want a chocolate vibe? Use chocolate Oreos for the crust instead of Golden Oreos—it’s indulgent and pairs so well with the strawberry topping.
FAQs About Strawberry Crunch Cheesecake
Making cheesecake can feel a little intimidating, especially if you’re new to it. But don’t worry—I’ve got answers to some of the most common questions:
What if I don’t have a springform pan?
No springform pan? No biggie. Just use a 9-inch pie dish instead. The only tricky part is that slicing might not look as neat since the sides aren’t removable. Here’s a hack: line the dish with parchment paper, leaving some extra hanging over the edges. Once it’s chilled, you can lift the whole cheesecake out for easy slicing.
Can I freeze this cheesecake?
Absolutely! This dessert freezes beautifully, which is great if you’re making it ahead for a special occasion. Wrap the entire cheesecake (or individual slices) tightly in plastic wrap and aluminum foil. It’ll keep in the freezer for up to 2 months. When you’re ready to enjoy it, let it thaw in the fridge overnight.
How do I make the best strawberry crunch topping?
The magic happens when you mix freeze-dried strawberries, Golden Oreos, and melted butter. The freeze-dried strawberries add that vibrant color and bold flavor, while the Oreos bring the crunch. If you’re feeling fancy, toss in some chopped nuts or shredded coconut for extra texture.
How long does it last in the fridge?
If stored properly in an airtight container, your cheesecake will stay fresh for 4-5 days in the fridge. But let’s be honest—it’s probably not going to last that long.
Variations of Strawberry Crunch Cheesecake Recipes
The beauty of this recipe is how flexible it is. You can make it your own with just a few tweaks. Here are some fun ideas to try:
No-Bake Cheesecake Jars
For a portable and super-cute option, layer the crust, filling, and topping into mason jars. These are perfect for picnics, parties, or even meal-prep desserts (yes, that’s a thing). Bonus: no slicing required!
Strawberry Shortcake Cheesecake
Take it back to basics by adding a layer of fresh strawberry slices between the crust and filling. It’s a nod to the classic dessert and adds an extra burst of freshness.
Chocolate Lovers Unite
Swap out the Golden Oreos for chocolate Oreos in both the crust and topping. Chocolate and strawberries? Name a better duo—I’ll wait.
Summer Tropical Cheesecake
Feeling summery? Replace the strawberries with mango or pineapple for a tropical twist. You can even sprinkle some toasted coconut on top for an island vibe.
Serving and Storing Your No-Bake Strawberry Crunch Cheesecake
When it comes to presentation, this cheesecake is already a star, but a few simple touches can take it to the next level:
How to Serve
- Add a swirl of whipped cream and a slice of fresh strawberry to each piece for that professional, bakery-style look.
- Drizzle with strawberry sauce for extra flavor and a pop of color.
- If you’re really feeling indulgent, pair it with a scoop of vanilla ice cream—because why not?
Storage Tips
Got leftovers? (Lucky you!) Here’s how to keep them fresh:
- In the fridge: Cover the cheesecake tightly with plastic wrap or store slices in an airtight container. It’ll last 4-5 days.
- In the freezer: Wrap individual slices in plastic wrap and foil, then freeze for up to 2 months. Thaw in the fridge when you’re ready to eat.
Conclusion
This Strawberry Crunch Cheesecake isn’t just a dessert—it’s a whole experience. From the buttery, cookie-like crust to the creamy filling and that show-stopping strawberry crunch topping, every bite is pure bliss.
It’s easy enough for beginners but impressive enough to wow a crowd, making it the perfect recipe for any occasion. So, whether you’re planning a party or just treating yourself (because, let’s be real, you deserve it), this cheesecake is a must-make.
And hey, if you do try it, don’t forget to share your masterpiece! Drop a comment, send us a photo, or tag us on social media—we’d love to see how yours turns out.
Ready to explore even more delicious ideas? Head over to the Forum Recipes blog for more simple, fun, and totally irresistible desserts. Happy baking!
